Installation guide
You will need a C compiler like gcc or clang, the NASM assembler, and a development toolchain of git, meson, and ninja. For some of the examples in the tutorial, you will need the free plotting program gnuplot, but this is not strictly necessary for using Cimba.
We also recommend using a modern integrated development environment (IDE) like CLion, which has the advantage of being available both on Linux and Windows, integrated with a gcc toolchain (called MinGW under Windows), and free for open source work.
Once the build chain is installed, you need to obtain Cimba itself. Cimba is distributed as free open source code through the Github repository at https://github.com/ambonvik/cimba. You download, build, and install Cimba with terminal commands.
Linux
On Linux, open a terminal window, change directory to where you want to have the source code tree, and enter these commands:
git clone https://github.com/ambonvik/cimba
cd cimba
meson setup build
meson compile -C build
sudo meson install -C build
You need elevated privileges (sudo) for the last step, since it installs
the library and header files in system locations /usr/local/lib
and /usr/local/include. These should already be in the respective paths for
compilation and runtime linking.
If you encounter errors, such as the include file not found by the compiler or the Cimba library not found at runtime, please check that these paths are correctly configured on your system. The details of how to fix the issue may be distro-specific, so we will not try to give a recipe here.
Windows
As always, things are more complicated on Windows. So far, Cimba only supports a MinGW-W64 build chain with the gcc or clang compiler. MSVC is not yet supported.
To use the MinGW-W64 build chain, first make sure you have gcc installed and
in your PATH by typing gcc --version in a command shell. If it does not respond,
please install it before continuing, see https://www.mingw-w64.org/.
We have encapsulated most of the Windows setup complexity in a batch script called
setup_MinGW.bat. This script will call on Microsoft Powershell internally to
change system environment variables safely.
Start a command shell (cmd.exe) as administrator. Change directory to where you want to have the Cimba source hierarchy and issue the following commands:
git clone https://github.com/ambonvik/cimba
cd cimba
setup_MinGW.bat
meson compile -C build
meson install -C build
This will install Cimba in C:\Program Files\Cimba and add its bin
directory to your PATH. Close the administrator command window when this is done,
restart your computer, and open a new command window without administrator privileges.
Type echo %PATH% to verify that the Cimba directory now is in the PATH.
If you have Windows Security ransomware protection enabled, you may have to
allow access for various build chain applications to your build folders. You may
also encounter issues with incompatible DLL’s already installed by other applications.
Windows will load the one first encountered in your PATH environment variable,
which may be older and incompatible with newly compiled source code.
This may be solved by reordering the items in your PATH or updating the other
applications to the latest version. If all else fails, copy libwinpthread-1.dll
from the mingw64\bin directory to the same directory as your executable files.
Verifying your installation
After installation, we can write a C program like [tutorial/hello.c]:
#include <cimba.h>
#include <stdio.h>

int main(void) {
    printf("Hello world, I am Cimba %s.\n", cimba_version());
}
Compile it as any other C program, linking to the Cimba library:
gcc hello.c -lcimba -o hello
If all goes well, this program should produce output similar to:
Hello world, I am Cimba 3.0.0-beta.
You now have a working Cimba installation.
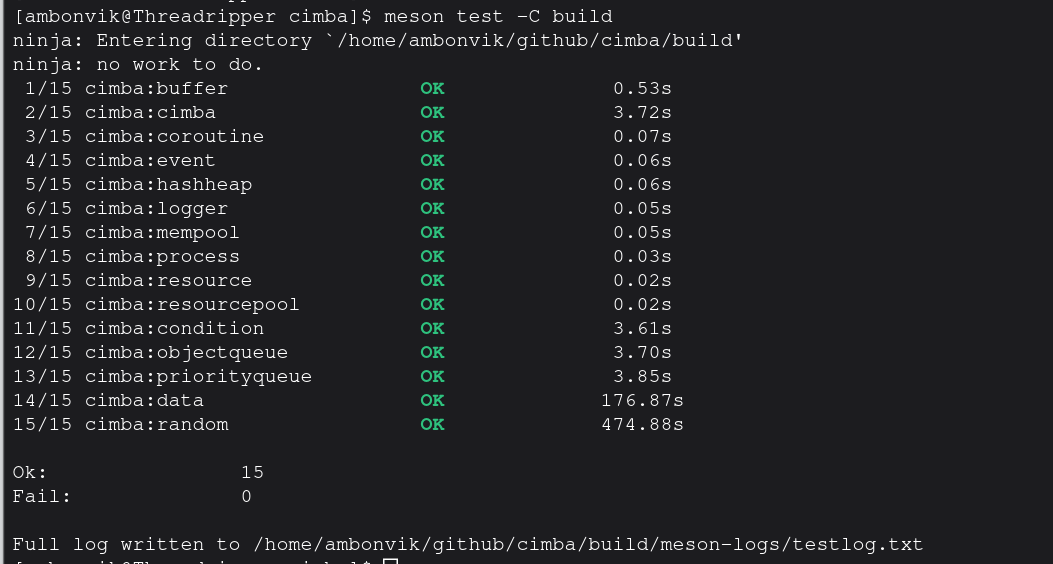
For a more comprehensive test, type:
meson test -C build
This will run the full suite of unit tests from the test directory. It will
take a while. The output will look similar to this: